06 Mar Master Bathroom Renovation Update

I wanted to share with you today an update on our Master Bathroom renovation. You can read more about where we started and what prompted the reno here.
Not a whole lot has changed from the inspiration board, but I am pondering tweaking one or two things.

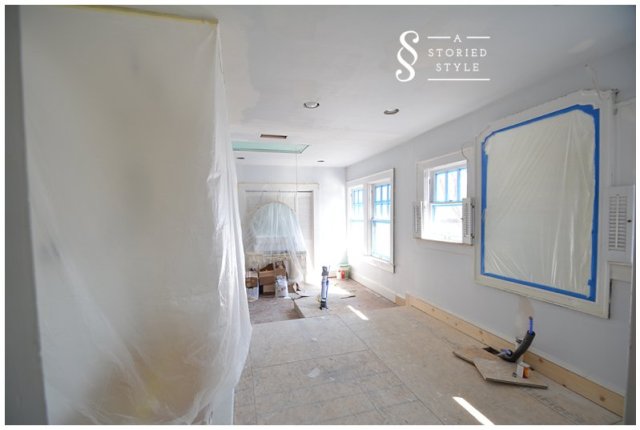
As you can see, we have a subfloor now, and the walls have been made smooth. We are ready to paint hopefully soon.

We built this small platform so our barber shop sink will have something to sit on to give it a little more height. My husband had this idea, and I think it is so smart. (have I mentioned lately what a great design partner he is?) He wanted the sink to feel like part of the main bathroom, and I think this platform is just the unity these two spaces needed. The sink will be perpendicular to the main floor, so one will step down and turn to use the sink.

I am very passionate about saving as much as we can of the original bathroom, so the old trim was carefully taken off and put back. We replaced wood only as needed. You can see where the old and new blends in this photo. Of course, when it is painted, you will never know.

As happy as I am to see this room opened up (I seriously cannot believe how much lighter it feels), I am most excited about the shower transformation. It is fully tiled and grouted, and it looks fabulous.

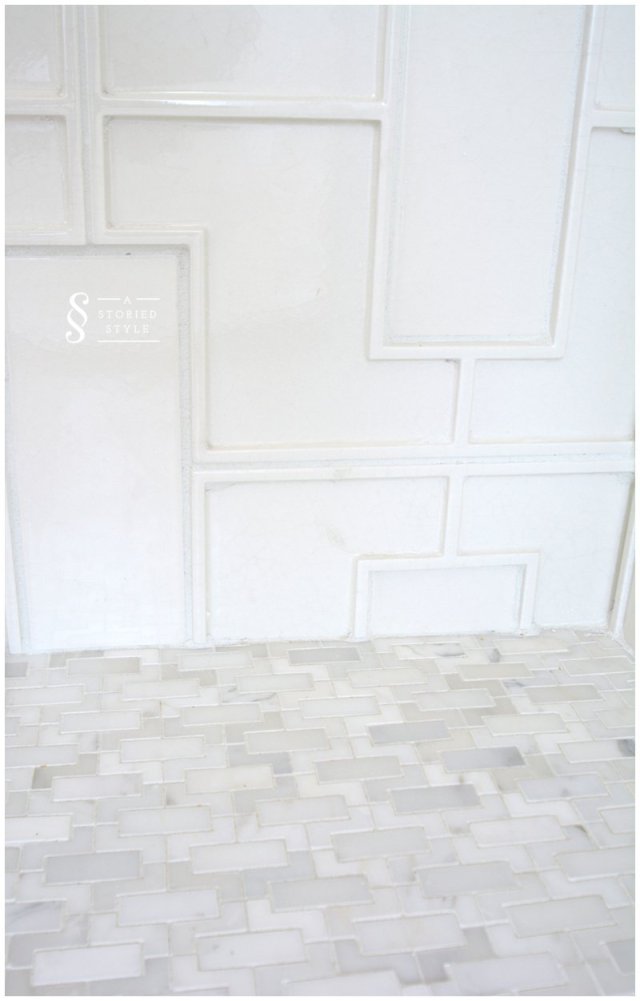
This is the only tile in this bathroom, and I really wanted it to be a wow factor. I love that this tile pattern was based on a 1920’s design since that is the era of my home. Isn’t it amazing how some design elements are timeless? This geometric design will look classic, fresh, and modern ten years from now.
When you are designing a space, little details make all the difference in what is pretty and what is amazing. The marble mosaic floor tile is a smaller version of the wall tile, and I laid it so it would look like it traveled up the wall and nestled itself inside the niche. You can see the flow here.


Against the wall where the shower valves will be located, the tile is moving horizontally. It adds some interest.

The ceiling tiles are a simple subway brick.

One of the riskier design elements in this room is the main area floor.
We are planning for it to be a combination of wood and marble. We wanted to incorporate the wood floor in the step down area of the bathroom since it is original. I love the parisian apartment look with chevron wood floors, and I love the color of raw wood flooring. This is a sample the flooring guy made up for us.

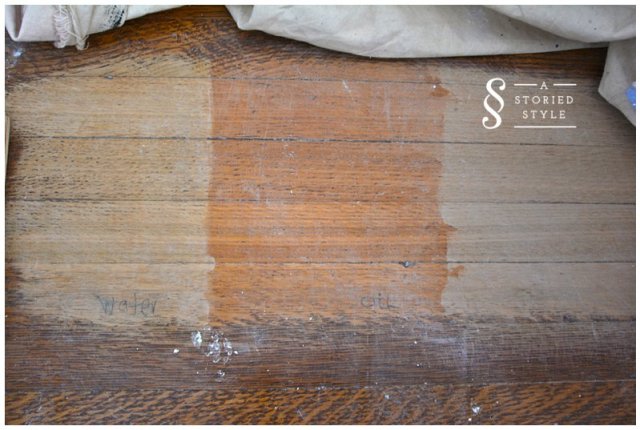
When the original floor was sanded down, I knew that was what I wanted. You can see here how we experimented with water and oil sealers. I definitely like the water sealant better as the natural wood floor color does not change much. The raw wood is on the right, raw wood + an oil sealer is in the middle, and raw wood + a water sealer is on the left.

The main bathroom floor will consist of 3′ x 3′ squares of chevron wood surrounded by six inches of marble border. I originally wanted to place the herringbone squares on the diamond. You can get the general idea here.

I just think that is going to look strange, especially around the shower where you are going to have weird cuts and fractions of this herringbone. The asymmetry may be discombobulating, I’m afraid. To be honest, I’ve always been a little unsure about this plan, but it looked better drawn on the diamond than it did in straight rows. However, this is a perfect illustration on how things look different on paper than they do in real life, and you tweak as necessary. Therefore, I’m thinking the herringbone will be laid in rows, surrounded by the marble. The chevron piece we have is about eighteen inches so double that to get a feel for the size of the wood square.

My friends over at Bottega Design Gallery, who I ordered all of my tile through, really came to the rescue on the marble. I needed large sizes (24″ long and 18″ long), and the original marble I picked out had been discontinued in that large size. I was pretty bummed as the original tile I chose was the perfect milky white with subtle streaks of gray and hints of gold. But Rebecca (owner at BDG) found me a new marble that looked just like the other one. The only thing was, it only came polished so we had to get it honed. (which is not very expensive by the way!)

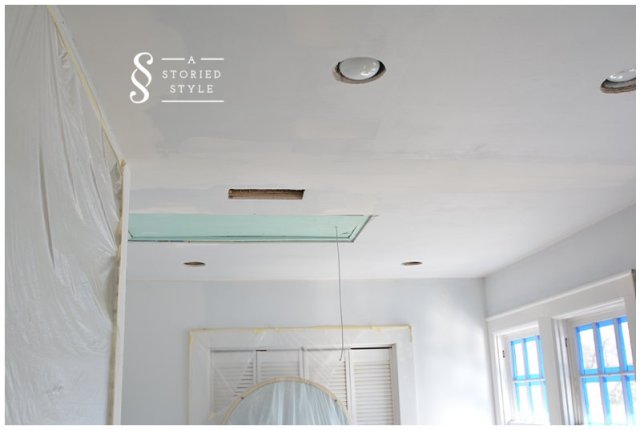
As far as other updates, the attic entrance needs to get moved to the guest room/my office,

I’m still pondering what to do with my beautiful bench I bought for next to the tub from Scout Design Studio (I’m still thinking gold legs and peacock blue velvet),

and all of the hardware has arrived except for the slide bar for the shower. I’m torn on aging the unlacquered brass myself, or letting it age naturally.

That’s all the news! We are two months in now, and I’m of course ready for it to pick up a little bit. But don’t all good things require patience? : ) I enjoy taking you along with me step by step, and I hope to have another update sooner rather than later!
Still, we’ve come a long way, right?


Emily
Posted at 15:58h, 06 MarchYou inspire me so much Grace! This is gonna be one beeee-utiful bathroom! That shower tile turned out amazing.
Grace
Posted at 16:02h, 06 MarchThanks Emily! I’m anxious to see how the floor tuns out! I think I’m going to draw it on the plywood before we get started. Fingers crossed. 😉 xo, G
Diane
Posted at 18:45h, 06 MarchBeautiful!!! Love following along…
Grace
Posted at 19:04h, 06 MarchHow kind, Diane! I’m so happy you are following along! Thank you so much for taking the time to comment. G
Belle
Posted at 19:25h, 06 MarchCan’t wait to see the finished bathroom. Thought I would mention that incorporating some fretwork screen elements in the closet doors with mirror backing might tie in nicely with the fretwork tiles.
Grace
Posted at 19:56h, 06 MarchBelle, what a fantastic idea! I had not even thought abut putting a fretwork detail on the mirrored doors! I think that would look so lovely! I’m going to measure that out tonight; hopefully, the new doors will be wide enough to do that on. Thank you so much for the idea, love it! xo, G
Amber
Posted at 09:39h, 07 MarchWow! It sis coming alone so nicely! It’s going to be absolutely gorgeous!
Amber
Posted at 09:39h, 07 Marchthat was weird. when I typed my comment, the letters didn’t show up, so I couldn’t see my tupos!
Amber
Posted at 09:40h, 07 Marchhaha typos! it happened again as I was typing. Strange!
Grace
Posted at 10:06h, 07 MarchHa! So weird, the Internet is so perplexing at times! 🙂
Grace
Posted at 10:06h, 07 MarchThank you, Amber! They are working away right now! I so appreciate your comment and you following the progress. xo, G
Elizabeth @ The Little Black Door
Posted at 09:56h, 07 MarchGrace this bathroom is such a piece of art! I’m so thrilled to follow along and can’t wait to see that floor. In my head it looks amazing. 🙂
Grace
Posted at 10:05h, 07 MarchElizabeth, as you know, that is the BEST compliment! 🙂 Thanks so much for encouraging the floor idea. In my head it looks amazing, too. (fingers crossed) I have this look in my head, but I cannot find a photo like it anywhere. Plus the flooring guys keeps telling me they have never done it this way. I hope that doesn’t mean this is a bad idea. 😉 I’ll keep you updated for sure! xo, G
emily
Posted at 05:20h, 08 MarchThe tile turned out beautifully. I love that it has a pattern, but since it’s white it looks so refined. And, I think the floors are going to be gorgoues…very luxurious!
Grace
Posted at 09:55h, 08 MarchHi Emily, thanks so much! I’m so glad you like the idea of the floor, it’s a little out of the box which I love of course, but at the same time, I feel a little nervous about it! I will hopefully have a better idea next week of how this is going to play out. 🙂 xo, G
Dominique Paolini
Posted at 16:55h, 20 MarchI LOVE the inspiration board and the tile in your shower. Gorgeous!
Evan
Posted at 14:09h, 09 AprilWow, I need to steal that tile design! It absolutely makes a statement and creates a memorable room! Great, now I got my next summer project!
Grace
Posted at 11:42h, 15 AprilThank you Evan!
Lisa researching bathroom remodel
Posted at 16:49h, 10 AprilI am in love with that tub.
Grace
Posted at 11:43h, 15 AprilHi Lisa, thank you! I love it, too, and I got it from Vintage Tub. I will have a post up about it hopefully in the next week or two. G
Brit
Posted at 20:25h, 04 MarchGreat post! I am in the process of finishing off my new home design, and I couldn’t be more excited to finally get underway with construction. Thanks for sharing this!