03 Dec DIY Tutorial: Christmas Moss Letters
These moss letters have a natural feel and evoke Christmas festivity with the addition of your favorite Christmas ribbon. Best of all, they are easy to do and not overly time consuming.
What You Need:
1. Cardboard letters – I found mine at Joann’s, though I’m sure you can find them at your local craft store. They come in various sizes and fonts (mine are about two fee tall). Note: I think if you purchased the small letters and followed this DIY, these would make darling holiday teacher gifts!
2. Hot glue gun
3. A large bag of hot glue sticks – you will need them!
4. Moss Mats – also available at your local craft store in the floral department. (I can get two letters out of one package.)
5. Scissors
6. Pretty Ribbon (I chose a beautiful 5 inch wide red satin ribbon – also from Joann’s.)
Step 1: Choose your letters.
Of course, you can choose different Christmas words – Merry, Joy, Noel, Ho-Ho-Ho, etc. You could also just do the initial of your last name, and hang it on your front door.
Step 2: Open and roll out your moss mat.
Make sure you have the moss to the floor, and the backside of the moss mat facing you.
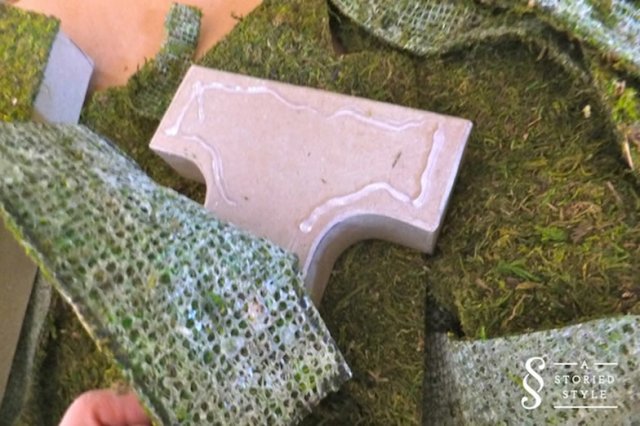
Step 3: Trace your letter.
Using a Sharpie or other thick tip marker, trace your letter. Note: It doesn’t matter for all letters, but to be on the safe side, trace all of your letters backwards.
This is what it will look like after you have traced your letter.
Step 4: Cut out your letter.
Cut out your letter making sure you are cutting right at the outside edge of your line. You want a little bit of room for seams. Make sure you keep your scraps, you will cut them into strips and use them for the edges of your letters.
Step 5: Glue the moss to the face of the letter.
Take your hot glue gun and slowly paste the moss to your letter one section at a time. Following the outline of your letter, apply hot glue and press to ensure adhesion.
Then you will have this!
Step 6: Cut strips to do the outside edge of the letters – you want it to be pretty from all angles! Note: If I were giving this as a gift, I would put pretty paper on the back, too.
Use the width of the letter as a guide to cut your strips.
Step 7: Glue the strips to the edge of your letter.
The great thing about working with moss is the seams disappear because of its texture. It is very simple to make these letters look like a smooth sheet of moss covering them by using this tactic.
Place a generous amount of hot glue right at the edge of the seam.
Using your fingers, press the edges of both moss pieces together.
See! No seam here!
Note: If you have a little extra moss hanging off the back of your letter, it is easy to trim with a pair of scissors.
Step 8: Admire your pretty letter.
Repeat with remaining letters as desired, and you have a beautiful project!
As I stated before, I chose wide red satin ribbon to hang my letters. Since only the “O” and the “E” could have ribbon looped around the top, I had to come up with other ideas for the “N” and the “L”. For the “N”, I hot glued the ribbon to the back at a slight angle, so the ribbon would not be pulled funny when I hung it. (i.e. don’t glue the ribbon completely vertical)
For the “L”, I simply glued a drapery weight to the bottom left corner to keep it from being tilted. Worked like a charm! (sorry, no picture – drapery weights are readily available at your local craft store or Walmart)
These letters are lovely inside or outside, but I placed mine on an expanse of brick wall between two windows on my front porch. More to come on my Christmas porch decorations. I may or may not still have pumpkins on my porch. (wink, wink), but it’s beginning to look like Christmas around here!
What do you think? How can you use this idea in your home? I’d love to hear your thoughts and ideas – sound off in the comments!


Sorry, the comment form is closed at this time.