
10 Dec DIY Tutorial: Holiday Hostess Gift (under $10)

(this is a fun little gift for friends, too!)
With the Christmas season upon us, many of you are heading to holiday parties and get-togethers with friends. With so many things to do (so many, right?!), it is easy to forget a little gift for your hostess. Clearly, no hostess is expecting a gift, but it is nice to be able to bring a little something to say thank you for all of the work she has undoubtedly put into the gathering.
My advice is to put together a little batch of these gifts to make it easy on yourself to grab and go. The premise is very simple – cute napkins, ribbon, a few decorations, a little stamping – done. These napkin gifties take minutes to put together, and are easy on your pocket. (LESS THAN $10!!)
Here’s how to make them…

Materials you will need:
* package of pretty paper napkins (mine were from Anthropologie, but I don’t see them online. they had several cute ones in store.)
* ribbon to wrap the napkins
* stamps and stamp pad
* scissors
* paper to stamp on
* optional: paper to make a little card with
First things first, remove the price sticker off of your napkins. (because Miss Manners says to)

When I’m stamping several things with the same phrase, I find it easier to stamp them all together. So when you’re done, you’re done! Two or three light dabs of ink on your stamp is all you need.

I cut strips of paper for each of my phrases and stamped them. I stamped “sparkly holiday cheer” since it fit with my napkin pattern. At the end of each strip, I cut out a little triangle to make them look like banners.

The beauty of adding these handmade touches to your gift is it makes a set of napkins personal. If all of your letters are not perfect when you stamp them, don’t fret! It just adds to the charm in my opinion.

Use your fingers to make your paper look like a roller coaster to give it some texture. This will add some interest and come into play when we put everything together.

Wrap your ribbon around your package however you like. You can wrap it traditionally or do something a little different like I did below.

Now I will let you in on a little secret, I did not make the cute little paper decorations on my napkin gifts. They were FREE from Anthropologie! They have a couple of little fun gift accessories you can choose when you are buying a gift from there for someone. Pretty great, right? Insta-special.
Once I tied my ribbon, I placed my decoration on top of the napkins and pulled both ends of the ribbon through the hole and tied them.

Then I placed my little banner on top of the knot and tied it. And voila, my friends, a perfect little gift.

Adding a personal card is as easy as folding a small piece of pretty paper in half, and writing a message on the inside.
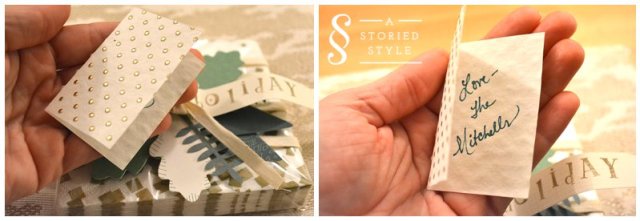

I love these types of gifts that make people feel loved, to let them know you took time for them. Nothing big, just a little something.

It is so simple and easy to make a batch of them to grab as needed!

Hope you have some sparkly holiday cheer in your life today!
Tricia
Posted at 19:17h, 10 DecemberHow sweet! A perfect little gift on its own but extra special with the added touches. Thanks for a great idea.
Grace
Posted at 16:05h, 11 DecemberThanks Tricia! I hope you use it! xoxo, G