
13 Jan DIY Tutorial: Coffee Table To Flokati Ottoman

I’m so excited to share with you a DIY I did recently for my living room! It was a fairly easy project, and I have been asked several times “what store I bought my stools from”, which is always what you want to hear when you’ve DIY’ed something.
Let’s get started, here’s what you will need…
Materials:
* coffee table, preferably one with a little “lip” (I’ll talk more about this in a sec)
* dropcloth
* medium-grit sandpaper
* primer
* spray adhesive
* scissors
* spray paint in your desired color
* flokati rug or throw (they sell these everywhere, mine is from Home Decorators Collection seen here)
* foam (I prefer two or three inch)
* heavy duty staple gun, staples
* mdf board cut to the size of the top of your table
* hot glue
Step 1: Finding Your Coffee Table

I bought this vintage pair of black end tables from an estate sale for $45 (yes, $22.50 a table) several months ago. (they really had me at “pair” – finding a pair of something great is always a plus) I loved the shape and the fretwork, and I instantly had this DIY idea when I saw them. People ask me a lot what to look for when buying vintage items because it can be hard to see past a bad finish. A good indicator that what you are buying will be a solid piece is the brand name. It takes a little time to educate yourself on good brands to look for, but these were made by Lane, so I knew they would be nice and sturdy. They are heavy too, so I knew they were solid wood. (Side Note: Other good brands to look for when buying vintage furniture: Baker, American of Martinsville, Dixie, Henredon. These are just a few, I can write future post on a more extensive list if anyone is interested.)
Step 2: Sanding Your Coffee Table

Note: Prior to sanding, I make sure there is no gunk on my piece. Just take a wet paper towel and wipe your piece thoroughly – make sure to get in those crevices so you don’t have any dust globs later.)
Take your sandpaper and give your coffee table a light sand. Don’t get too crazy, you don’t want to mark your wood unnecessarily. I usually use a medium-grit sandpaper for projects like this.
Sttep 3: Wipe Down Your Coffee Table

After sanding, I like to take an ever-so-damp paper towel and wipe my piece. You can see here the “lip” I was talking about on my coffee table. See how it is raised a bit along the edge of the top? I knew this would be a great candidate for an upholstered ottoman because I could set a board in it, and you wouldn’t see it. You don’t have to have this on your piece, but it may help your finished product look more professional. (although the flokati is so thick, it hides a board really well)
Step 4: Priming Your Coffee Table

I had this gray Valspar primer on hand so that is what I used. Plus I knew I wanted to paint my ottoman frame a charcoal gray to match the backs of the shelves in my living room, and the gray would be a nice layer under the darker gray. Use long, even strokes to prime. I cannot stress this enough with spray painting. We all get a little excited and want to finish quickly, and I am also guilty of getting a little exuberant with spray paint. Slow yourself down, do a couple of light coats, and call it a day. Primer dries pretty fast, so this is a quick step.
Note that my primer is not perfect, you just want a thin coat.

Step 5: Painting Your Coffee Table

Do a few light coats of your spray paint on your coffee table. (I think I did three or four) Again, don’t get too hurried! If you see a drip, wait for it to dry, lightly sand it, and spray lightly again. Do not, and I repeat, do not mess with wet paint.
Note: Since the tops of my tables were going to be covered, I didn’t worry too much about the center of the tops being painted – just the edges.

I ended up using this Blue Hawk spray paint from Lowes because it was the only charcoal gray spray paint (“smoke gray”) I could find. I was pleased with it and felt it did a really nice job without any dripping. I would definitely use the Blue Hawk brand again!
Step 6: Don’t Forget The Underbelly

Sometimes I find when I’m painting something like this that I finish and then realize I missed a spot in a hard-to-see place. Although everyone is probably not quite as particular as I am about this sort of thing, I like to let the top dry, turn my piece over, and spray the edge and the bottom of the feet so they will be nice and even.
Step 7: Cutting Your MDF, Adding Foam, Cutting Your Flokati

Something I love about Home Depot is that they will cut your wood/mdf to size. So so nice if you don’t have the tools, or if you just plain don’t want to do it! I went to Home Depot, grabbed a piece of mdf, gave them the measurement of the top of my table, had them cut it, and paid. Easy peasy. Then I headed to my local craft store and bought enough two inch foam for both of my tops. You can see in the photo above that I laid my mdf on top of my foam, and drew a line so I knew where to cut off the excess.

Typically, you want to cut your foam with an electric knife, but if you don’t have one, like me, it works fine with scissors.
You may have to cut from one side and then cut from the other though.

Your edge may be a little jagged, but that’s okay. The flokati is so thick that it will be covered up, and no one will ever know!

Spray a coat of adhesive on your foam and lay it on top of your mdf board, pressing lightly to help it adhere. Then cut a piece of your flokati leaving about three inches on each side. You may lose a few “hairs” after cutting your flokati, but this is no big deal. This is the clump I had after my project was complete.

(You can see in the photo below that I had a little extra foam hanging out from my board after I had everything layered together – not sure why, but it is not a big deal)

Now you’re ready to start stapling!
Step 7: Upholstering Your Flokati

Make sure your board is centered on your piece of flokati. Actually, let’s stop here for a second, and allow me to do a little PSA about staples.
I ran out of staples after my first row, and I replaced them with some other staples I had on hand. Annoyingly, the staples would not stay in the board and kept bouncing back out at me. It wasn’t until after my husband made two trips to the hardware store that we discovered some staples had flat legs on the bottom and some had pointed legs. YOU DEFINITELY WANT THE STAPLES WITH POINTED LEGS SO THEY WILL PUNCTURE YOUR BOARD. See the photo below.

After looking at several boxes, I realized there was absolutely no indication of the legs on the outside of the box. You literally have to open the box and look at the staples to determine if they have the correct legs for this project.

Okay, now we’re ready to move on…
I like to upholster by pulling the center of my fabric tight and stapling in the center of one side. Then I work out to the edges from there.

Since this is such a thick fabric, I did my staples fairly close together, about every two inches or so. You can make a little open row in your flokati to make sure you are going straight. Pull your fabric tightly, press the head of your staple gun firmly on the space you want to insert the staple, and let her rip.

You want to do the sides opposite each other consecutively. Therefore, I stapled the top and the bottom, and then I did the left and right side.
Although you can do this project by yourself, it is nice to have an extra set of hands to help you pull things tightly. (also when your hand gets tired from stapling) Thanks Husband!

Pause for cuteness…I did peek up from my work at one point, and this sweet one looked pretty adorable immersed in a “Curious George”. I am loving her newly formed curls!

I stapled my flokati on each side until I got to about two inches from the edge. Surprisingly, upholstering the corners on this project is incredibly easy! If you have upholstered before, you know that sometimes you have to do fancy folds, and it can be a little frustrating. Because the flokati is so thick, you literally grab the end that is sticking out, pull it up tightly towards the center of your board, and staple it two or three times. And that’s it!

Step 8: Attaching Your Tops

The backs of your ottoman tops will look like the above photo once you are done stapling, and then you are ready to attach them!
I did not do anything fancy for this step. I simply applied a heck of a lot of hot glue to the bottom of my mdf board, quickly centered the upholstered board on the frame, and sat on my new ottoman until I thought it was dry. (hot glue dries fast, so this was twenty seconds or so)

Since I had two of these ottomans to make, I repeated the above steps, and then I had two flokati ottomans!
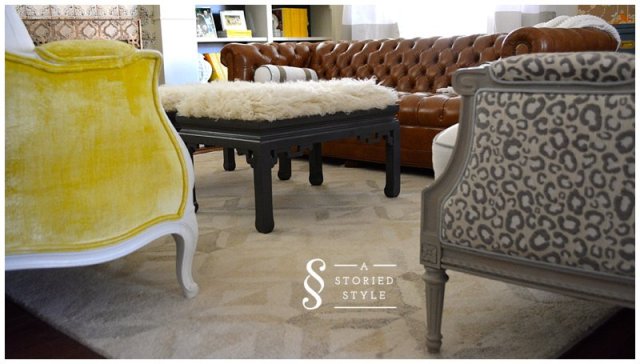


I’m pretty proud of them, they turned out great! It is such a good feeling when you see something that needs a little love, form an idea to beautify it, and that idea really works.


I’ve always really liked the texture of flokati, but to be honest, I have thought this type of rug was not really practical for my household to be on the floor (four small kids = lots of little crumbs, sand, etc. constantly stuck in it).

With this project, I get the look I love, the texture the room needed, and I don’t have to worry about shoe debris and other flokati hazards.

Win-win! Think of all of the unloved coffee tables you see at vintage furniture stores, thrift stores, estate sales, and CraigsList. TONS!! And you can find them for so cheap. Using this tutorial, you could easily give a modern lift to an old classic.
P.S. If you have enjoyed this tutorial, please share it! You can like me on Facebook here, and you can subscribe to this blog by entering your email address in the “Subscribe” box in the right sidebar. As always, I love your comments – I read and respond to every one! And if you have a question on this tutorial, please feel free to leave that in the comment section, too.

Emily
Posted at 16:34h, 13 JanuaryThis was fantastic Grace! I love the way they turned out, and I especially love the shape of the legs on the coffee tables too.
Grace
Posted at 21:46h, 13 JanuaryThanks Emily! I love the ming legs, too! Thanks for your encouragement! G
Liz
Posted at 17:59h, 13 JanuaryLove the tables. I noticed the beautiful fireplace screen that was in the photo with your little one. I am looking for something just like this. May I ask where it is from?
Grace
Posted at 21:57h, 13 JanuaryHi Liz, I bought it on CraigsList actually, but you can find it here.
http://www.horchow.com/Lexington-Single-Panel-Fireplace-Screen/cprod92860008___/p.prod?icid=&searchType=MAIN&rte=%252Fcategory.service%253FNtt%253Dfire%252Bscreen%2526pageSize%253D120%2526No%253D0%2526refinements%253D&eItemId=cprod92860008&cmCat=search
I know it is pricey, but every once in awhile, you can score something like this at Horchow Finale for super cheap. Maybe call the one closest to you to find out if they have one? or something similar?
Hope that helps! G
Felicia
Posted at 09:03h, 14 JanuaryGrace,
These turned out so well! And they complement your living room so well – love it!
Grace
Posted at 14:33h, 15 JanuaryFelicia, thank you so much! It’s FINALLY coming together around here. 🙂
Felicia
Posted at 09:03h, 14 JanuaryGrace,
These turned out so well! And they compliment your living room so well – love it!
cassie {hi sugarplum}
Posted at 11:06h, 14 JanuaryThose look great!!! Such a fun project!
Grace
Posted at 14:35h, 15 JanuaryThanks Cassie! I just checked out your piano bench, it looks great, too! It’s so hard to find a good looking one!
Ellie
Posted at 12:01h, 08 AprilDo you have ago of source for the flokati? Thanks!
Grace
Posted at 21:33h, 08 AprilHi Ellie, I got it from Home Decorators! I think I put the link in the post. Thank you for reading and let me know if I can help you with anything else! G
Mimi
Posted at 16:17h, 27 MayI bet I’m not the only one who’d like to see your “future post” on the more extensive list of “good brands to look for when buying vintage furniture” Did you do it already & I missed it? I know some, but would love to compare my list w/ yours!
I’m green w/ envy — these are exactly the tables for which I’ve been searching at an “affordable” price for over 35 years (in any condition — as long as they’re sturdy, I’m a great refinisher/painter) and never found. If you ever come across some similar, let me know. I’ll pay you + finder’s fee/profit